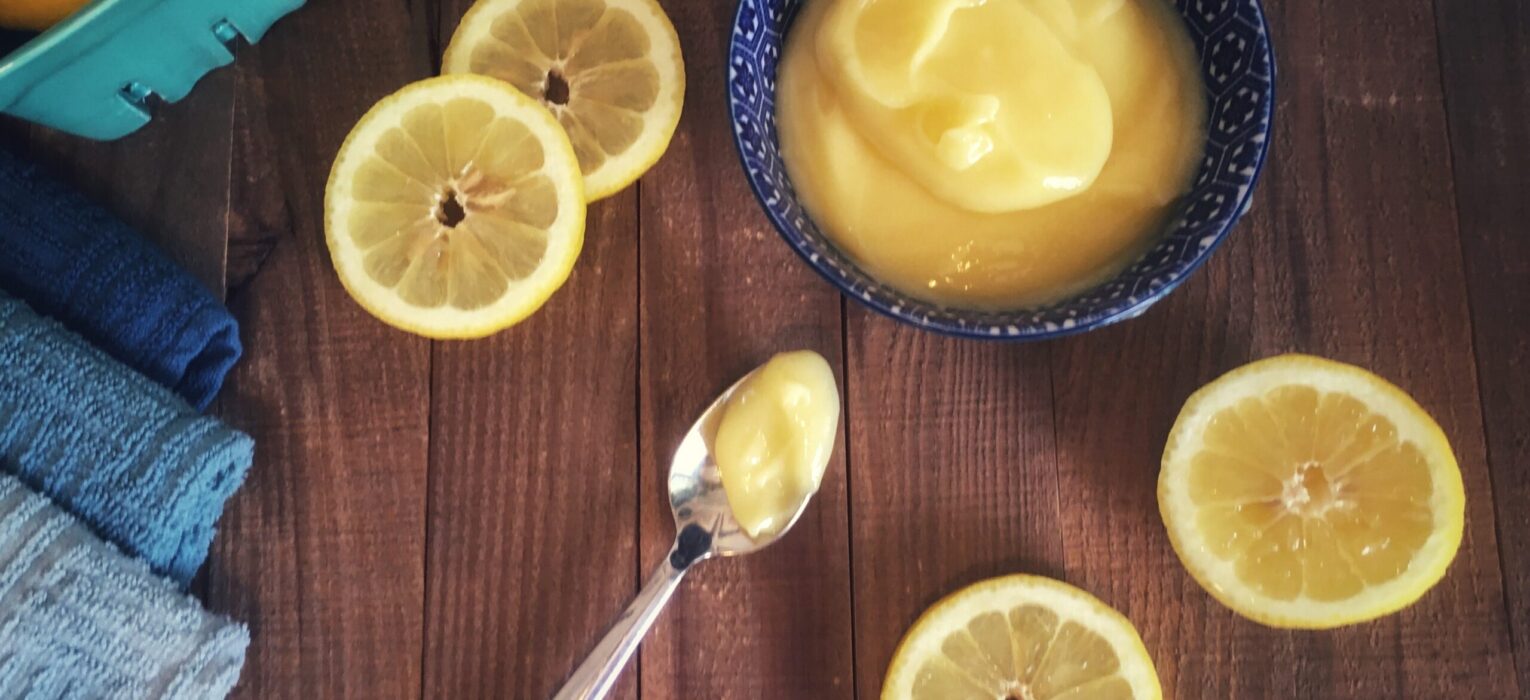
A slightly thicker version of lemon curd with just as much ‘zest,’ I use this to fill cupcakes, but you could also layer it with shortcake, use it to fill a tart, or use it in a parfait! You can also serve this with fresh berries and scones (see below for more options).
Ingredients
- 1 cup granulated sugar
- 1 tsp corn starch
- 1 tsp lemon zest
- 2/3 cups lemon juice
- 4 large eggs (room temperature); you will use two eggs whole and two yolks
- 6 Tbsp (3 ounces) unsalted butter
A Note on Lemons
Various sizes and types of lemons will yield different amounts of zest and juice. Having made this recipe many times, I find that I use 2 large or 4 medium lemons to yield about 1/3 c lemon juice – so I buy ready-made lemon juice to make up the difference. I have also found that Meyer lemons yield more zest…so I only need the zest of 1 Meyer lemon to obtain 1 tsp of zest, whereas when I use other lemons, I need two to get enough zest! So…my advice would be to always have an extra lemon or two on hand when planning on making lemon curd!

Tools & Timing
- Heatproof whisk
- Large spatula
- Electric beaters
- Medium pan, preferably with high sides (I use a 2 quart sauce pan)
- Measuring cups and spoons
- Prep bowls (2 large and 2 small)
- Cooling rack
- Large glass bowl for cooling (see notes in step 10 below)
- Plastic wrap
- Storage container (if using later)
- Prep and cook time: 15 min; cooling time: 60 min
- Yield: almost 2 cups
- Lasts 1-2 weeks in the fridge
Background
I really love the “Perfect Lemon Curd” recipe from Homemade & Yummy; however, I wanted something a little thicker to use as a cupcake filling. With some experimentation (which involved a shift of ingredients and some changes in the cooking process), and a few additional tips and tweaks, I now give you my Lemon Curd Filling recipe!
This recipe is adapted from Homemade & Yummy’s Perfect Lemon Curd
Step-by-step
Prep:
- Let eggs and butter come to room temperature (get them out of the fridge about an hour before you begin)
- Zest the lemon(s) for 1 tsp of lemon zest – keep in mind that various lemons will yield different amounts of zest…that’s why you should have 2 lemons handy for this recipe!
- Squeeze the lemons – I find that 2 large lemons yield about 1/3 c of juice; measure out remaining juice to make a total of 2/3 cup
- Separate two yolks; place them in a bowl with the cracked whole eggs
- Carefully whisk together corn starch and sugar (you don’t want a cloud of corn starch in the air)

When you’re ready to cook:
- Using electric beaters, cream (whisk) the butter until it is blended and smooth – this takes about 15 seconds on medium low speed
- Add ½ sugar/corn starch mixture and beat on low; then, once the sugar/corn starch is mostly blended, add the rest. *Mixture will begin to look fluffier as it blends, but will not be completely blended (incorporated) due to the corn starch
- Add eggs, one yolk at a time, beat until each yolk is incorporated; once all eggs are added, beat for an additional 1-2 minutes.
- Slowly whisk in lemon juice, a little bit at a time (I add about 1-2 Tbsps at a time), blending after each addition. PS: don’t worry if the mixture looks a bit lumpy! Because of the acid in the lemons, the mixture may separate slightly – it will smooth back together once we start cooking
- Transfer to medium pan.
- Cook over low heat, whisking continually, until mixture is smooth (about 2 minutes and 45 seconds).
- Once mixture looks like it coming together again, increase heat to medium and cook, whisking slowly and continually, until mixture just begins to boil (about 4 – 5 minutes).
- Return heat to low and cook an additional 2 minutes to encourage mixture to thicken; continue to whisk slowly and evenly!
- Remove from heat and stir in zest.
- Using a large spatula, transfer into a glass bowl or pan – choose a pan that wide so your mixture is about an inch thick once you transfer it (my bowl is 7 in in diameter with straight sides (so the bottom has the same width as the top).
- Immediately cover with plastic wrap PLACING PLASTIC DIRECTLY on the surface of the Lemon Curd Filling (lightly lay wrap on top of bowl – working in sections, gently lift wrap, ease it down onto the curd, and then move to the next section.
- Place bowl onto a cooling rack to encourage air flow underneath
- When curd filling is cool (check by placing your hand on the bottom of the bowl – it should be cool – this takes at least an hour), transfer to storage container(s) or your choice and put in fridge.
*If I’m using this as a filling, I simply leave it in the glass bowl for later use; if I’m using it as a condiment, I put it in a cute jam jar!
Uses


I LOVE using this sweet curd filling to make my Cupcake -in-a-jar recipe…to fill tarts…and to create my No Bake Cheesecake Cups! I also spread it with cream cheese on toast for a delightful, easy brunch.