Ingredients for the Marshmallows
- 3 packets Knox Gelatine (21 grams)
- 1/2 cup water, cold + 1/3 cup water, room temperature
- 1/3 cup Dutch cocoa powdered (or unsweetened cocoa powder)
- 1 ½ cups granulated sugar
- 1 cup light corn syrup
- ¼ tsp kosher salt
- 1 Tbsp vanilla
- 1-2 Tbsps powdered sugar (for dusting)
- 1-2 Tbsps Dutch cocoa powder (for dusting)
- *Optional peppermint dust
Chocolate Coating (Optional, but so fun!)
- 4 ounces of white dipping chocolate; more to drizzle (optional)
- 6 ounces of semisweet chocolate (about 1 cup chocolate chips)
Tools & Timing
- Candy Thermometer (a thermometer that can measure high temperatures; candy usually cooks around 240 degrees F)
- 13 x 9 glass baking dish
- Parchment paper
- Plastic wrap
- Wax paper and cookie sheet (or tray)
- Cooking spray
- Large saucepan
- Medium glass prep bowl
- Small glass bowl
- Beaters and a large, glass mixing bowl (or stand mixer)
- Heatproof whisk
- Two large, heatproof spatulas
- Measuring cups and spoons
- Timing: 30 minutes, plus at least 6 hours to rest and prep/dip time
- Yield: If cutting in 1 ½ in squares, about 35 marshmallows
Background
For the past few Christmases, I’ve been experimenting with making different homemade marshmallows…this year, I wanted to swapped out the bourbon in my favorite marshmallows for Kahlua and add chocolate in order to create a Magical Mocha Marshmallow! Enjoy!
This recipe is adapted from the recipe for marshmallows in Sally’s Candy Addiction.


Step-by-step
Since this process requires you to stir and move quickly, it’s important to have all of your components ready-to-go before you start!
Prep ahead:
- Measure ½ cup of water and place in fridge to chill.
- Line glass baking pan with parchment paper, making sure you have enough to extend over the edges. Lightly grease using cooking spray. Set aside.
- Place a spatula and cooking spray next to your prepared dish – you’ll want these ready-to-go!
- Measure out 1 Tbsp of vanilla and place it in a small prep bowl – you won’t want to stop whipping your marshmallows to do this later!
- Fill your sink with hot, soapy water (this is a sticky endeavor, so you’ll want to soak some things immediately – trust me)
- Measure 1/3 cup of water into microwave safe glass bowl. Microwave for 1 minute and 30 seconds. Add 1/3 cup Dutch cocoa powder, stir until blended, and set aside to cool slightly.
When you’re ready to begin:
- Pour your chilled ½ cup of water into a large glass mixing bowl (I use a 2 quart bowl for this – you’ll need lots of room to beat your marshmallows). Sprinkle your gelatin as evenly as possible onto the water. Without turning the beaters on, gently stir the gelatin into the water so it’s moistened. The gelatin will begin ‘to bloom’ in the cold water as it sits while you cook your syrup. (When gelatin ‘blooms,’ it soaks up the water and becomes a thick gel – hence, gelatin!)
- Slowly add your cocoa mixture from step 6 above. Whisk on low speed for about 30 seconds to gently combine your cocoa and gelatin mixtures. Then, turn off your beaters (but do not remove them) and allow the gelatin to continue to bloom in the water/cocoa mixture as you begin your syrup.
- Begin your syrup: in a large saucepan, measure your 1 1/2 cups of granulated sugar, 1 cup of light corn syrup, ¼ tsp of salt, and your ½ cup of Kahlua. Turn heat to medium and begin to whisk.
- Whisk slowly and constantly until sugar dissolves into the mixture and all of the liquid is incorporated (about 1 minute).
- Continue to cook WITHOUT STIRRING until the mixture reaches 240 F (this takes about 10-12 minutes, so begin to test the temperature at 10 minutes – and remember not to touch the bottom of the pan with your thermometer). For most of this time, the mixture will be boiling.
- *As your sugar mixture cooks, continue to work with your gelatin/cocoa – every 3 minutes, turn your beaters to low for about 20 seconds and mix to ensure that your gelatin and cocoa stays blended.
- Once your sugar mixture reaches 240, get ready to mix it into your gelatin (all of the water should have been incorporated into the gelatin by this point): Turn off the heat and remove the sugar mixture from the heat source (set on a cool burner). Set your beaters on low. Whisk the gelatin for 20 seconds (it will be chunky). Then, slowly pour the syrup directly into the center of the bowl with your gelatin , cocoa, and water. Careful, as it’s hot! Use a rubber spatula to scrape out all of the syrup mixture from your pan – then place pan and this spatula into hot, soapy water.
- Once all of the syrup has been added, gradually increase the speed of your beaters to high (I start on low and increase one speed every 15 seconds, so it takes me 1 minute and 45 seconds to get from low to high).
- Beat on high for 10 – 12 minutes (the mixture will begin to turn white after about a minute or so…the mixture should really begin to thicken after 5 minutes…keep going!).
- After 10 minutes, add 1 Tbsp vanilla and beat for 1 more minute.
- Grease your second rubber spatula.
- Working quickly, use your greased rubber spatula to transfer your marshmallows into your prepared pan. If necessary, use your spatula to evenly spread your marshmallows into the pan.
- Put glass bowl, beaters, and spatulas into hot, soapy water.
- Trim off extra, overlapping paper so the plastic wrap won’t get stuck to it.
- Loosely cover dish with plastic wrap, without touching the marshmallows.
- Let marshmallows rest for at least 6 hours (or overnight).


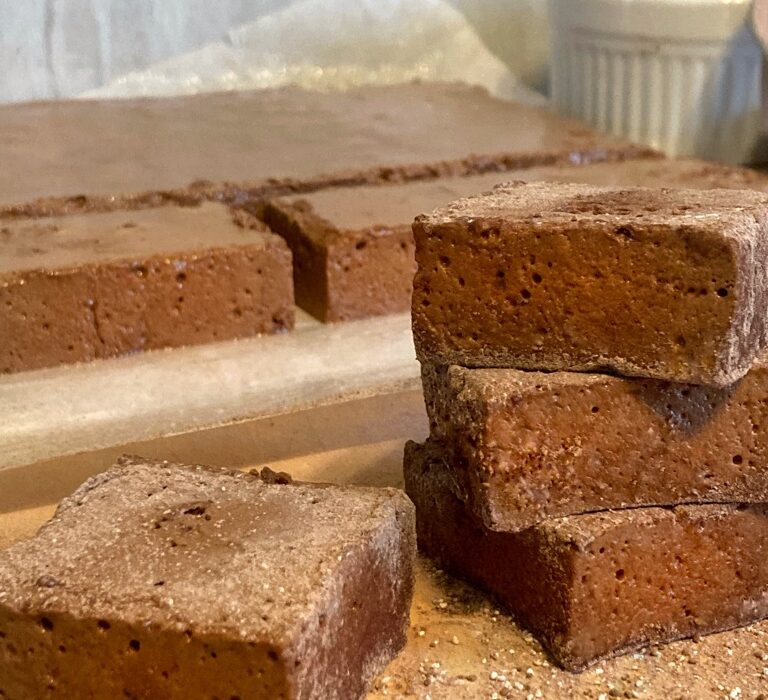
Cuttin’ Time: MARSHMALLOWS ONLY
If you are simply making marshmallows, follow these directions…
- Combine 2 Tbsps of powdered sugar and 2 Tbsps of Dutch cocoa powder. Set aside.
- Once marshmallows have rested, cut them into squares: dust a cutting board with abut 1/3 of your sugar/cocoa mixture. Using the sides of the parchment paper, lift the marshmallows on the parchment out of the pan onto a clean cutting board and flip them onto your powdered sugar/cocoa. Then, use another 1/3 of your mixture and sprinkle on the top. Spread it out gently.
- Use a very sharp knife to cut into squares. You will want to lightly dust your knife with remaining powdered sugar/cocoa. I have found that it is much easier to cut the homemade marshmallows by pressing downward several times to make a cut rather than slicing a knife through. I also dip my fingertips in the powdered sugar too to so I can hold the marshmallows without getting sticky.


Cuttin’ Time: DIPPED MARSHMALLOWS
If you are planning on dipping your marshmallows, follow these directions…
- Place wax paper on clean cookie sheet or tray.
- Combine 1 Tbsp of powdered sugar and 1 Tbsp of Dutch cocoa powder.
- Use a very sharp knife to cut into squares. You will want to lightly dust your knife with powdered sugar, but try not to get too much onto the marshmallows themselves as it will cause the chocolate not to stick later! I have found that it is much easier to cut the homemade marshmallows by pressing downward several times to make a cut rather than slicing a knife through. I also dip my fingertips in the powdered sugar too to so I can hold the marshmallows without getting sticky.
- Place cut squares onto wax paper, keeping the original bottom down (the bottom will still have cooking spray on it – this will help your marshmallows not to stick to the wax paper). Once done cutting, place tray in the fridge to firm up your marshmallows (this will help when you dip the marshmallows in the warm chocolate).
- Chop the white dipping chocolate then combine white dipping chocolate and chocolate chips in a heatproof bowl. Microwave at 30 second intervals, stirring after each interval for 10-15 seconds. Continue this process just until chocolate is smooth; careful not to over-microwave…we don’t want burnt chocolate. (This took me a total of 90 seconds).
- Dip each marshmallow square – I alternate dip one end (or one side diagonally for visual interest) with dipping the entire marshmallow. If you’re dipping half, you won’t need any tools; if you’re dipping fully, use forks or dipping tools to help. Then, I place the partially dipped marshmallow on wax paper to dry (sometimes I garnish with a drizzle of white chocolate or various types of sprinkles, chocolate chips, graham crackers crumbs, or crushed, dried raspberries). *To make white chocolate drizzle, melt another ounce of white dipping chocolate in a separate bowl. Add a splash of vegetable oil (this helps to thin the chocolate out so it drizzles better). Use a spoon (or piping bag) to drizzle the white chocolate onto your chocolate covered marshmallows.
- *Option to sprinkle with peppermint dust for Christmas!
- Once all marshmallows are dipped, return to the fridge for 10 minutes to help the chocolate set.
- Store in airtight container.
*To make chocolate dip, blend white dipping chocolate and semisweet or dark chocolate chips using a 2:3 ratio (this means that I use 2 ounces of white dipping chocolate and 3 ounces of the chips). Blending white dipping chocolate (sometimes called candy coating or melts) with semisweet or dark chocolate tastes much better than chocolate flavored dipping products – trust me! I used Guittard Extra Dark Chocolate baking chips, and the result was fantastic.
Serve and Enjoy
These marshmallows should be stored at room temperature. They last well for at least a two weeks.